Add-A-Pet
Users Guide
NOTE: This example is for a specific setup, your Add-A-Pet page may be different. In fact it may vary from Clinic to Clinic with in the same installation.
Adding a Private Cremation or a single Communal Cremation
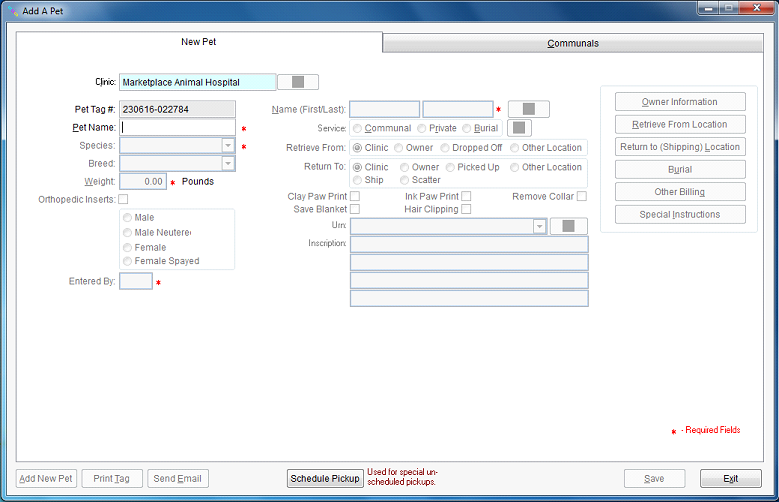
When you add a pet to be cremated, the screen above is used.
When you start you clinic’s name and the Pet Tag Number is automatically filled in for you. The program will then step you through all of the different fields that need to be filled in.
Fields with a red asterisk next to them are required fields and need to be filled in before you continue to the next.
These fields are:
- Pet Name
- Species
- Breed
- Weight
- Orthopedic Inserts - Select this if you know that there are metal inserts in the animal.
- Sex
- Entered By - Enter your initials in this field
- Name (First and Last) The First and last name of the owner of the pet as you would like it to appear. There is a button just to the right of the first and last name fields, this will allow you to select an already existing pet owner from you owners list. See Appendix F
You will have to enter complete information on the owner if you one of the following is true. 1> The owner will be responsible for paying the invoice. 2> If the pick up address is the owners address, 3> if the drop off address is the owners address. If any of these are true, then See Appendix A - Service Select either a Private or a Communal Cremation. If you want another type of cremation., See Appendix B
- Retrieve From This will be set automatically to Clinic. If you need to have the pet picked up from another location such as the owners house, or shipped to a location other then the clinic, you can do so. See Appendix C
- Return To See Retrieve From Notes Appendix D
- Other Items:
- Clay Paw Print These are the common items that an owner may wish to order when having the pet cremated. If you wish to see a whole product list See Appendix E
- Ink Paw Print
- Remove Collar
- Save Blanket
- Hair Clipping
- Urn The basic urn will be automatically filled in for you. If you wish a different urn, See Appendix F
- Inscription This is the wording that will appear the urn labels and shipping label
As you fill in each field, it will activate the next set of fields up to the next one that is required.
When all of the fields have been filled in correctly The <Save> button will become enabled so that you can save the pet. If there is an error detected in one of the fields, then the background color of that field will be red.
After saving the pet, you will be requested to print the “Pet Tag” this should be folded in 4ths so that the bar code is showing, placed in the plastic sleeve and placed on the bag that the pet has been placed in.
In addition, the <Save> button will now say <Update> in case you have to make any changes to this pets information. When you are done with this pet, you will have the option to either exit the system, or to add another pet by clicking on the <Add New Pet> button. All the fields will clear with the exception of your initials.
Appendix A – Owner Information
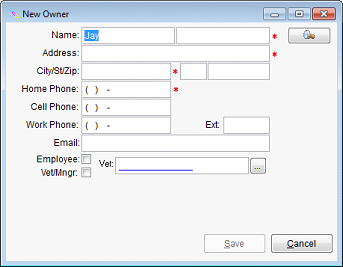
If the responsible party is the owner, or if the pick up or drop off location is the owner then the owner form will pop up to be filled in. In addition if you wish to add more owner information for a given pet, you can always click on the <Owner Information>
As on the main form, those fields with a red asterisk next to them are required fields. In addition if the owner is and employee or the vet, this is where you enter the information so that they can receive any discount that may be offered. Simply click on either the Employee or the Vet/Mngr check box and then enter the Clinic with which they are affiliated.
When all of the required fields have been entered, the <Save> button becomes enabled and you can then save the owner’s information.
Appendix B – Service Types
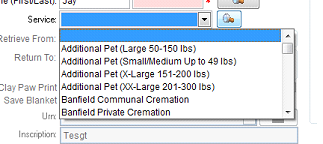
To the right of the “Service:” radio buttons there is a “Find” button. If you click on the “Find” button the radio buttons will be replaced with a combo box. Click on the down arrow on the right end of the combo box and you will be presented with a list of all available options for a Cremation. Scroll through this list to find the Service Type you wish and select that service type.
Click on the button a second time and it will switch back to the default radio buttons.
Appendix C – Other Retrieve From Address
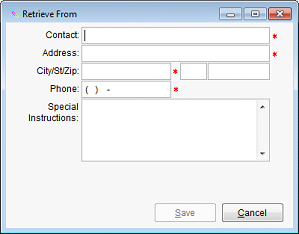
This form will automatically appear if you select “Other Location” in the “Retrieve From” set of radio buttons. In addition you can select the <Retrieve From Location> button on the top right section of the Add-A-Pet form.
Just enter the address to retrieve the pet from in this form. If there are any special notes, such as “pick up the pet on the back porch”, or “the owner is home after 3:00 p.m.” enter that information in the special instructions section.
Appendix D –Return/Ship To Address
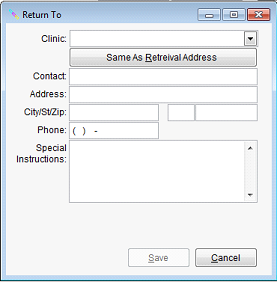
This form will automatically appear if you select “Other Location” or “Ship To” in the “Return To” set of radio buttons. In addition you can select the <Return To (Shipping) Location> button on the top right section of the Add-A-Pet form.
The clinic drop down is for quickly choosing a different clinic to return a pet to. This happens occasionally if the pet has been put down, or taken to an emergency clinic, but the owner wishes the ashes to be returned to their regular clinic.
The <Same As Retrieval Address> is for having the pet returned to the same address as it was picked up from, often the owner’s home address.
Just enter the address to return the pet from in this form. If there are any special notes, for delivery, enter them in the special instructions section.
Appendix E – Other Billing
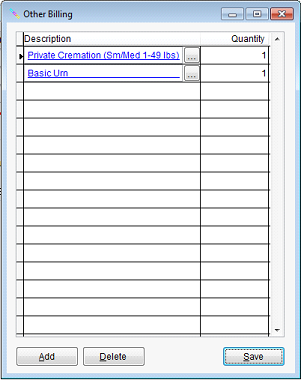
If you wish to sell something other than the standard items, you can select the <Other Billing> button and this will appear. You can add and delete items from the Sales Order Item list here.
If you select the <Add> button it will pop up the inventory find form See appendix G
From the Inventory Find form you can select an item to be added to the list. In addition you can change the quantity. This most often happens when someone want multiple paw prints.
Appendix F – Optional Urns
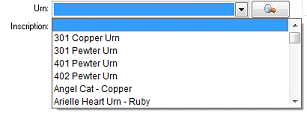
You can scroll down through the list of available urns and select the urn of you choice.
Appendix G – Inventory Find
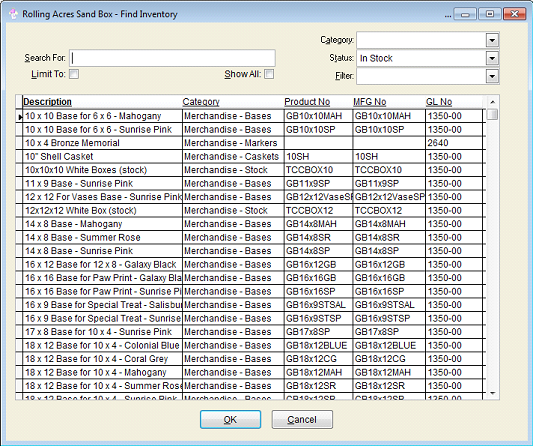
From this form you can select any item available from the inventory. Headers in the grid that are underlined mean that you can sort the list based upon that item.
When you type in the “Search For:” field, it will do an incremental search based upon the column that is sorted. In addition you can limit the list by Category (i.e. Urns)
Appendix H – Owner Find
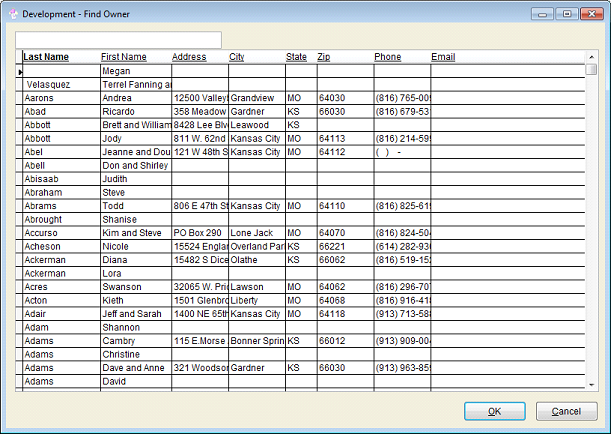
As in the other find forms, those headers that are underlined allow you to sort the list by that column. When you type in the field at the top, it will search based upon the selected column.
Once you find the owner you wish, either press the Enter Key, double click on the owner, or click on the <Ok> button to select that owner.
